
Meta title: Lower Ball Joint Replacement: DIY Steps, Cost and Signs
Meta description: Learn how to replace a lower ball joint at home. Get the symptoms, tool list, step-by-step process, torque advice, costs and answers to common questions.
Your lower ball joint holds your wheel to your car. A failed joint can drop the wheel and end your trip in seconds. Do you want to avoid that risk? You can replace the joint yourself, and this guide shows you how.
Mike Parra, an ASE-certified master mechanic with over 20 years of experience, co-authored a popular guide on this repair. That guide has 543,344 views. Those numbers show how many drivers search for this fix. Here you get the best details from top sources, plus safety checks that other guides skip.
What Is a Lower Ball Joint and What Does It Do?
A lower ball joint is a steel ball-and-socket link. It connects the knuckle to the lower control arm. It lets your wheel move up and down over bumps and turn left and right at the same time.
Why does that matter? On many vehicles, the lower joint carries the weight of the car. That load makes it wear out faster than the upper joint.
Your suspension layout decides how many joints you have. A MacPherson strut car often has one lower joint per side. A double wishbone truck or SUV has an upper and a lower joint per side. Check your layout before you buy parts.
How Long Do Lower Ball Joints Last?
Most ball joints last about 70,000 to 150,000 miles. Potholes, off-road trips and torn dust boots cut that range. Dirt and moisture enter a torn boot, and the grease escapes. The joint then wears fast.
Should you wait for a failure? Skip that plan. Inspect your joints at every tire rotation and every oil change.
What Are the Signs of a Bad Lower Ball Joint?
Bad joints send clear signals. Watch for these symptoms:
- Clunks or pops over bumps and in turns.
- Loose control. The car drifts on straight roads.
- Vibration in the wheel or the floor at highway speed.
- Uneven tire wear on the inner or outer edge of a front tire.
- A knock in the wheel well as you take a turn.
Do you notice two or more signs? Test the joints today. A worn joint pivots sideways and up and down, and that play grows worse at high speed.
How Do You Test a Lower Ball Joint for Wear?
Park on level ground and block the rear wheels. Raise the front wheel with a jack. The set jack stands under solid frame points. Grab the tire at the top and bottom and rock it. Next, slide a pry bar under the tire and lever it up gently.
Watch the joint as you do it. Any gap or free play signals wear. The joint should show no space at the contact point. Check the tie rod ends and the hub too, because they cause similar play.
Which lift point applies to your car? Strut cars and control arm cars differ. Read your service manual before you test.
Can You Drive With a Bad Lower Ball Joint?
Avoid it. A worn joint gets looser each day. A failed joint can separate, and the wheel can fold under the car. Speed raises that danger. Book the repair as soon as you confirm play.
What Tools and Parts Do You Need?
Gather all items before you lift the car. A half-finished job leaves you stranded.
Parts
- New ball joint, or a complete lower control arm with the joint installed
- New castle nut and cotter pin
- New grease zerk, if your joint has one
- Boot and hardware kit, if the box lacks them
Tools
- Floor jack and heavy-duty jack stands
- Wheel chocks
- Socket set and breaker bar
- Torque wrench
- Ball joint separator or pickle fork
- Hammer
- Ball joint press kit for pressed-in joints
- Wire to hang the brake caliper
- Penetrating oil such as PB Blaster or WD-40
- Grease gun
- Drill for riveted joints
Many auto parts stores loan out press kits. You pay a deposit and get it back when you return the tool.
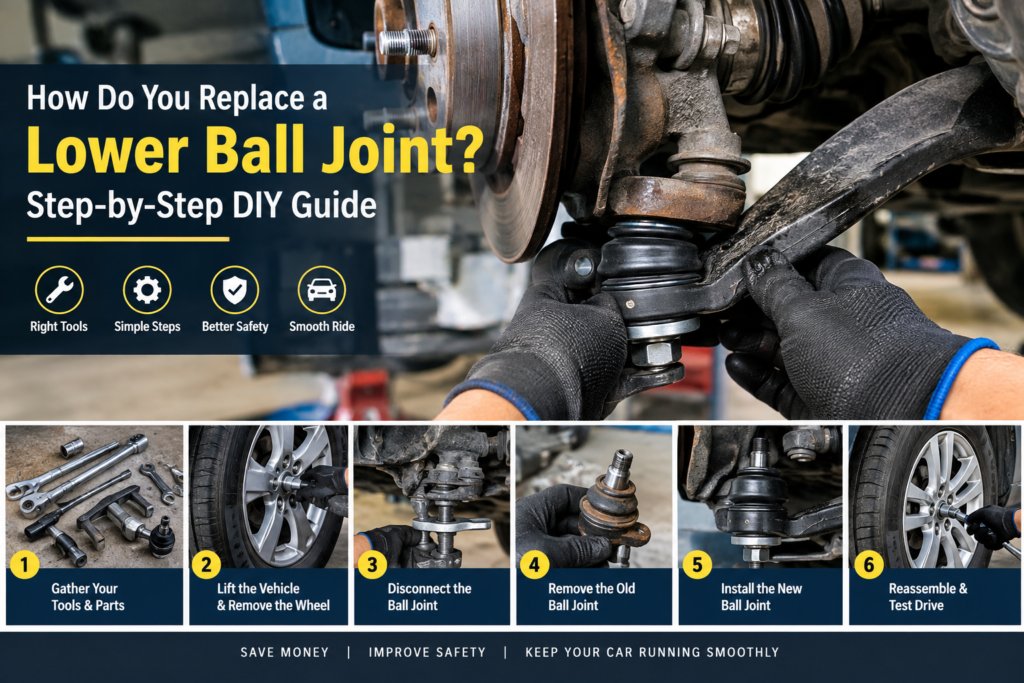
How Do You Replace a Lower Ball Joint Step by Step?
Procedures vary by make and model. Use the steps below as a map and follow your service manual for details.
Step 1: How Do You Prepare the Car Safely?
Park on flat ground and chock the rear wheels. Loosen the lug nuts before you lift the car. Raise the front end and set jack stands under solid frame points. Then remove the wheel.
Spray penetrating oil on every bolt you plan to remove. Let it soak. Rust and road grit lock fasteners in place. Which bolts need oil? Soak the castle nut, the pinch bolt and the control arm bolts.
Step 2: How Do You Clear Space Around the Joint?
Move the brake parts aside if they block access. Remove the caliper bolts. Hang the caliper on wire so the brake hose carries no load. A stretched hose can fail.
Some guides remove the rotor. Try to work around it instead. If you open the brake line, you must bleed the brakes, and that makes the job much bigger.
Step 3: How Do You Disconnect the Ball Joint Stud?
Pull the cotter pin. Loosen the castle nut a few turns and leave it on the threads. The stud then cannot drop free.
On a MacPherson strut car, remove the pinch bolt that clamps the stud. Then separate the joint from the knuckle.
Step 4: How Do You Pop the Stud Out of the Knuckle?
Drive a pickle fork or a ball joint separator between the control arm and the knuckle. Strike it with a hammer. The stud breaks loose with a sharp crack.
Expect a tight fit. A pickle fork tears the rubber boot, so use it only on a joint you plan to replace. A screw-type separator is gentler.
Do you want to use heat on a stuck part? Use care. Heat harms grease, rubber and brake lines. Try oil and more leverage first.
Step 5: How Do You Remove the Old Joint From the Control Arm?
Your joint attaches in one of three ways:
- Pressed in. Remove the circlip. Then push the old joint out with a C-frame press.
- Bolted on. Remove the bolts and lift the joint off.
- Riveted. Drill out the rivets. Use the bolts that come with the new joint.
Some cars need the control arm removed first. If a press does not fit your car, take the arm to a shop with a hydraulic press.
Is the arm bent, cracked or worn? Replace the whole arm. A complete arm often costs little more than a joint plus labor, and it saves time.
Step 6: How Do You Install the New Ball Joint?
Clean the seat in the control arm. Press or bolt the new joint in square. A crooked press ruins the joint. Refit the circlip on pressed joints.
Slide the new boot over the stud. Guide the stud up through the knuckle hole. Use the new hardware from the kit. Old bolts and boots corrode, so they fail early.
Step 7: How Do You Tighten the Bolts to the Right Torque?
Use a torque wrench. One popular guide quotes about 44 lb-ft on some bolts and around 80 lb-ft on others. Those values fit only some cars. Read your service manual for your exact figures.
Tighten the castle nut to spec. Align the slot with the hole in the stud. Fit a fresh cotter pin, because an old pin can fail. Reinstall the pinch bolt on a strut car.
Step 8: How Do You Finish the Job?
Pump grease into the new zerk until the boot swells slightly. Refit the brake parts and the wheel. Lower the car and torque the lug nuts in a star pattern.
Drive slowly around the block and listen for noises. Then book an alignment.
Do You Need a Wheel Alignment After Replacing a Ball Joint?
Yes. A new joint changes suspension geometry. Skip the alignment and your tires wear out early. An alignment costs less than a new set of tires, so treat it as part of the job.
Should You Replace Ball Joints in Pairs?
In most cases, yes. Both sides carry the same mileage and the same stress. If the left joint fails, the right joint follows soon. Replace both lower joints at once. Add the upper joints too if your car has them. You already have the front end apart, so extra parts add little labor.
How Much Does Lower Ball Joint Replacement Cost?
Costs depend on your vehicle, the part brand and your labor choice. A new solid joint runs about $80 to $90 in one popular guide. Shops charge several hundred dollars, and some bills reach $1,000.
| Option | Typical cost per side |
| DIY, joint only | About $20 to $150 |
| DIY, complete control arm | Often $80 to $250 or more |
| Repair shop, joint replacement | Roughly $250 to $500 |
| European or luxury car, full arm swap | About $600 to $750 or more |
You save most of that money when you do the labor yourself. Add the alignment fee to every option. Do you feel unsure? Get two or three quotes, because prices vary from shop to shop.
Is DIY Replacement Right for You?
Ask yourself three questions. Do you own jack stands and a torque wrench? Can you follow a service manual? Can you spend a full afternoon on the job?
If you answer yes, go ahead. If any answer is no, hire an ASE-certified technician. A rushed repair on a suspension part is a poor experiment.
Frequently Asked Questions About Lower Ball Joint Replacement
How long does a lower ball joint replacement take?
Experienced DIYers need two to four hours per side. Beginners should plan a full day. Rust adds time.
Can you replace a ball joint without a press?
Yes, for bolt-on and riveted joints. Pressed-in joints need a press. Rent one from a parts store, because a proper press protects the new part.
Can you remove a lower ball joint without a special tool?
You can try a hammer and penetrating oil. Strike the knuckle, not the stud. A separator tool works faster and causes less damage.
Can you replace a Toyota lower ball joint yourself?
Many Toyota trucks and SUVs use bolt-on or pressed joints. Some models sell only the complete control arm. Look up your exact year, model and trim before you order parts.
Where can you find ball joint replacement near you?
Search for local shops that list ASE-certified technicians. Read recent reviews. Ask for a written quote that shows parts, labor and alignment.
Do you need to replace the control arm?
Replace it when the arm is damaged or when the maker sells the joint only with the arm.
What happens if you ignore a bad ball joint?
Control gets vague and tires wear out. The joint can then separate. A separated joint can drop the wheel and cause a crash.
What Should You Remember About Lower Ball Joint Replacement?
- The lower ball joint links the knuckle to the control arm.
- Clunks, loose control and uneven tire wear signal wear.
- Park the car until you fix a joint with visible play.
- Use jack stands, a torque wrench and a fresh cotter pin.
- Replace joints in pairs and book an alignment.
- DIY saves hundreds of dollars per side.
What Is the Final Word on Lower Ball Joint Replacement?
A lower ball joint keeps your wheel attached to your car. Wear shows up as clunks, loose control and uneven tire wear. You now know how to spot each sign and how to test the joint for play.
Can you fix it yourself? Yes, if you own jack stands, a torque wrench and a service manual. You save several hundred dollars per side, because shops charge $250 to $500 for the same job. Mike Parra’s guide has 543,344 views, and that number shows how many drivers choose the DIY route.
Safety comes first. Use fresh hardware, torque every bolt to spec and book an alignment afterward. Replace the joints in pairs to protect both sides of the front end.
What is your next move? Check your joints this week and order the parts today. A sound suspension keeps you in control on every road.
CarRevix is an automotive information and services platform dedicated to car maintenance, repair, detailing, automotive SEO, and industry insights. It helps car enthusiasts and vehicle owners explore useful automotive guides, discover maintenance solutions, and stay informed about vehicle care and performance.